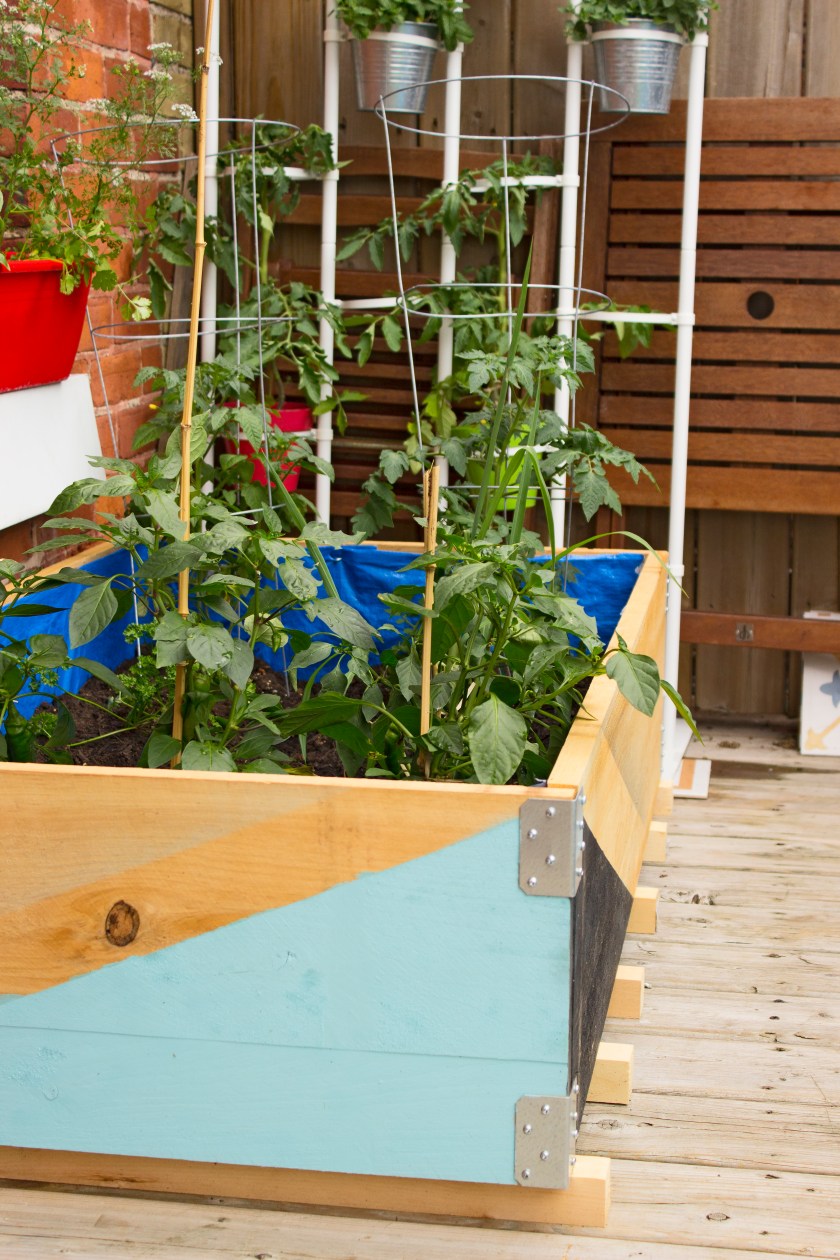
This year I am fortunate enough to live in an apartment with an outdoor space. I have been wanting to try my hand at gardening for a while so I bought some small pots and seeds and planted away. While my herbs are thriving, I became aware that I had overcrowded my hot pepper and tomato plants. This project is the solution to my problem. I was able to save money by constructing this planter myself with cheap lumber and “L” brackets purchased from my local hardware store. I even added some extra flair with some left over spray paint I had from another project.
What you will need:
- 4 pieces of rough pine cut to the size you wish your planter to be (I started with two 4′ boards and two measuring 2′ 4″)
- 6 pieces of 2″ x 2″ board slightly longer than the width of your planter (Mine were 2″ longer)
- 8 small “L” brackets
- 1 Tarp (I got mine at the dollar store)
- hammer
- screwdriver
- screws (or whatever you need to suit your choice of wood/”L” brackets)
- fencing staples or staple gun
- box cutter or other knife
- paints etc. for decorating (optional)
- potting soil
- plants/seeds
Instructions:
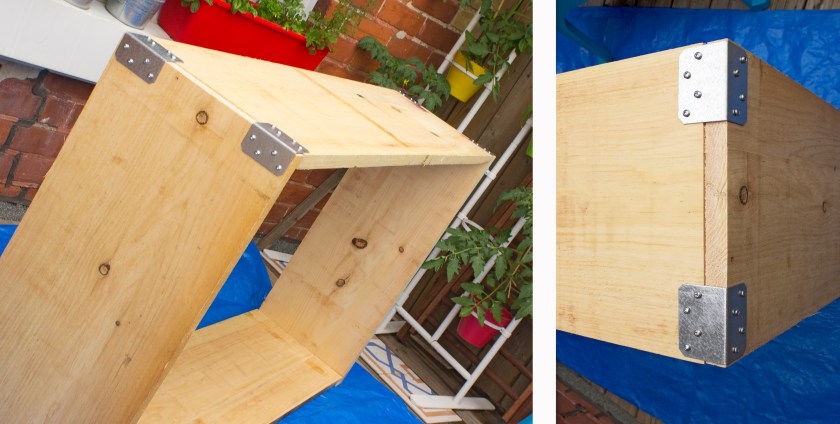
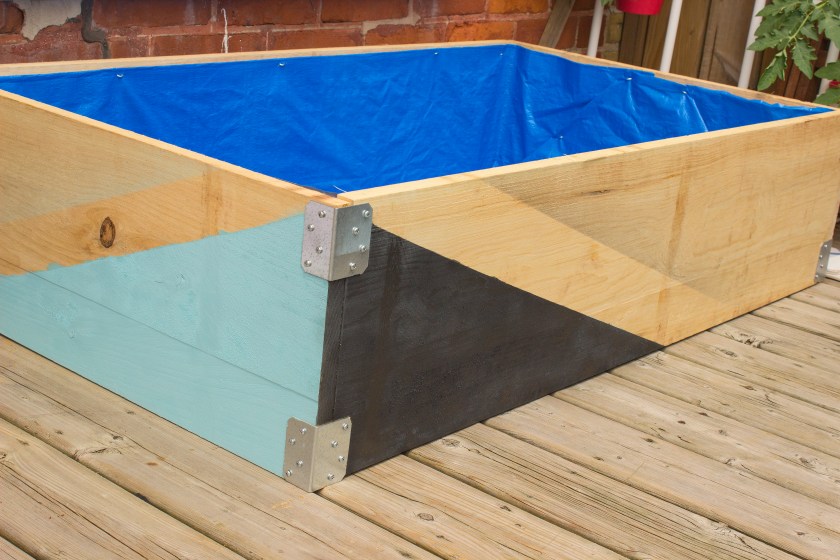
Step 1 – Arrange your lumber to form a rectangle and using a start screwing on those “L” brackets! Fix one along the top and bottom of each corner of your planter.
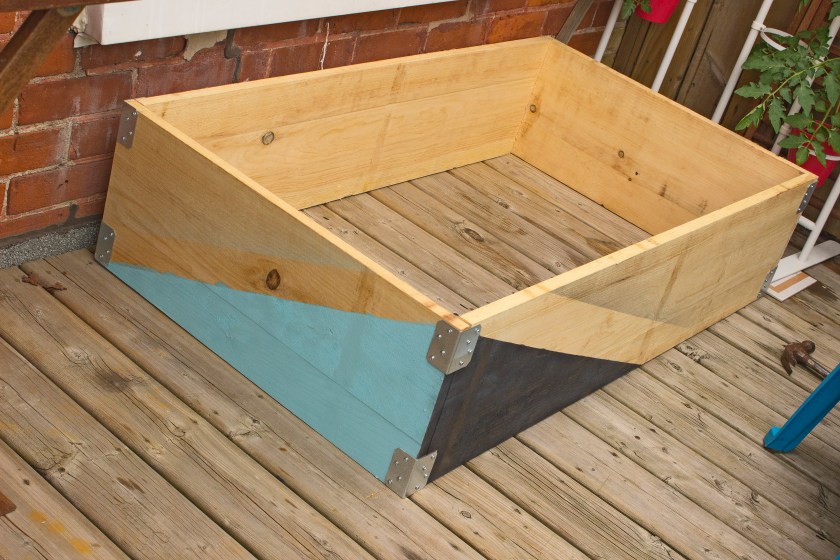
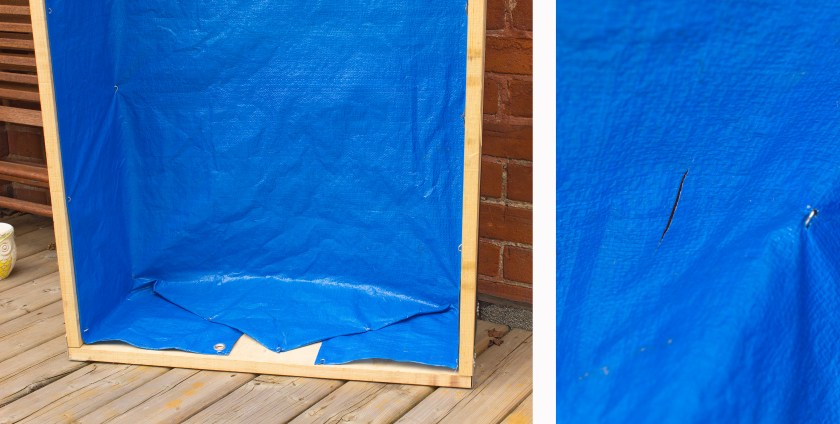
Step 2 – Using a hammer and staples attach the tarp to the inside edges of the box. I started by attached staples to one side of the box then stretching across to the opposite side and attaching there to create as flat a surface as possible on the bottom of the tarp. Next I stapled the other two side (use any gift wrapping skills you may have to pull taut and fold neatly. Trim excess tarp if necessary.
Step 3 – Cut slits in tarp to allow for drainage of soil.
Step 4 – Before filling with dirt take your 2″ x 2″ boards and place evenly spaced below your planter. These could be screwed or hammered in but I just left loose. If you leave loose make sure you have your planter where you want it to be when assembling.
* note: this step is important if you are putting your planter on a wood surface or one that could get damaged if damp for prolonged periods. It is not necessary if building on grass, soil etc.
Step 5 – Fill your new planter with soil and plants and/or seed. Enjoy!
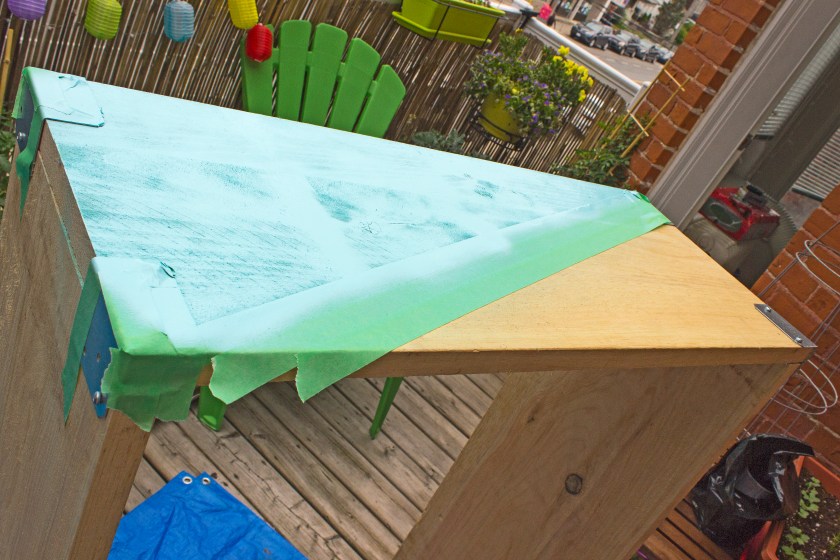
Optional – Decorating! You can do this at any point. Depending on what you have in mind it might be easier before you fix everything together but I added my spray paint between stages 1 and 2.