Hair Masks

Beauty, DIY

So. I got laid off, gave myself a haircut and am only allowed to leave the house to get food at the grocery store. Story of everyone’s life right now. But looking at the bright side I thought, what better time to tap into that frugal mindset and practice some self care while I’m at it? Partly out of boredom, partly out of curiosity and partly because I want to keep my newly trimmed hair healthy without dipping too far into my savings; here are 3 hair mask recipes that I made out of food. They all have different benefits for your hair. Make one of these or experiment with your own. All of these ingredients are really nourishing and are sure to leave your hair looking, feeling and smelling great. And they can all be found while on your weekly grocery run.

*Pro Tip from a friend: When rinsing out oil based hair masks it may be preferable to apply shampoo directly to hair before getting wet to better penetrate the mask and wash out cleaner. However, if you’re left a bit oily, just consider it a little residual conditioning.

**Note: it would be a good idea to double these recipes for long hair.
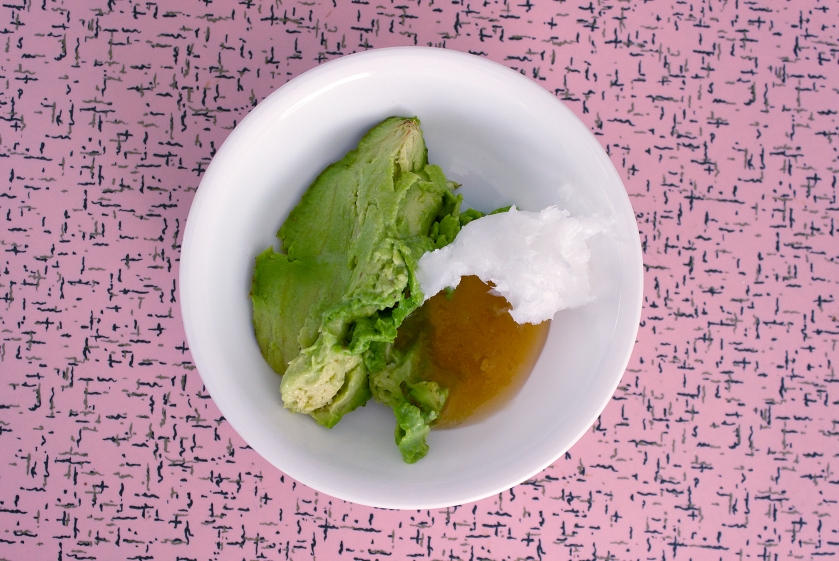
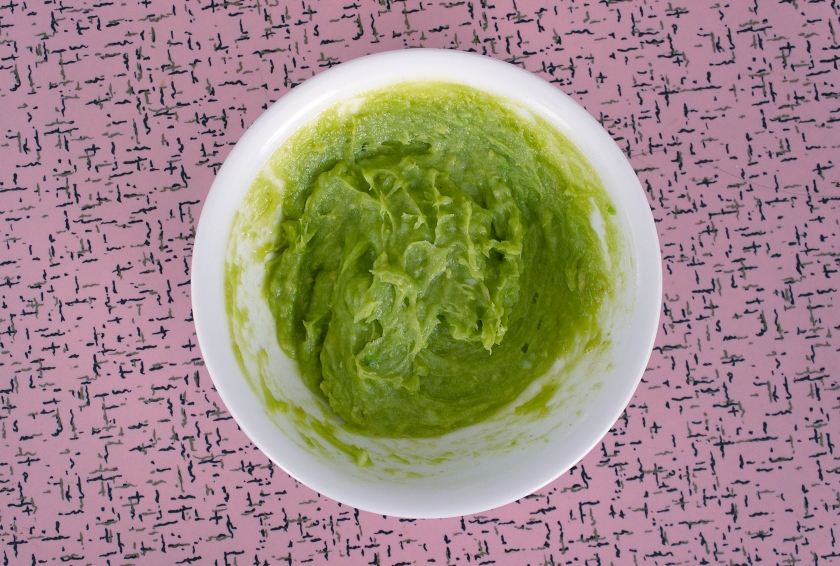
Fix That Shit

Things you’ll need:

  • 1 Tbsp Coconut Oil
  • 1 Tbsp Honey
  • 1/2 a ripe Avocado

Instructions:

Step 1 – Mash Avocado and combine with Coconut Oil and Honey

Step 2 – Mix well and apply from top to bottom

Step 3 – Let sit 15-20 min

Step 5 – Rinse well and wash hair with shampoo and conditioner
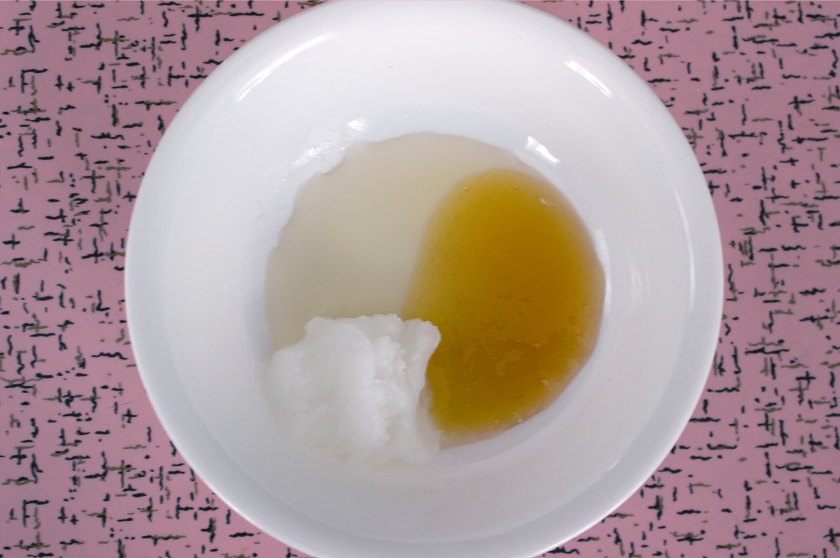
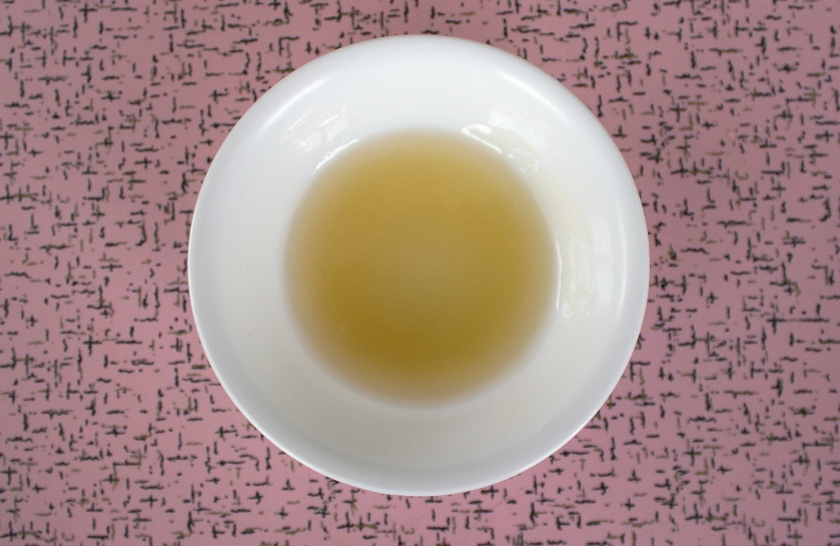
hair_mask_repair_1

hair_mask_repair_2

The Shining

Things you’ll need:

  • 1 Tbsp Honey
  • 1 Tbsp Apple Cider Vinegar
  • 1 Tbsp Coconut Oil

Instructions:

Step 1 – Combine all ingredients. I ended up using my fingers for this because the oil and vinegar didn’t blend well with a spoon.

Step 2 – Apply to Hair root to tip

Step 3 – Let sit for min 20 min

Step 3 – Rinse with shampoo and conditioner
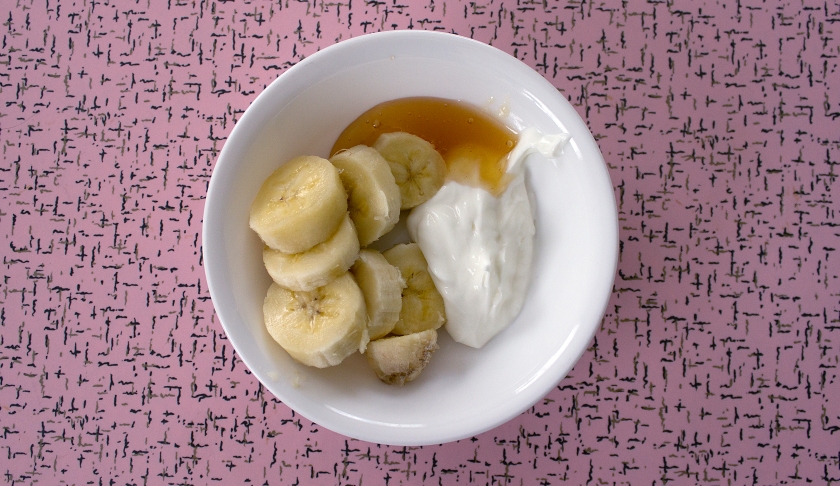
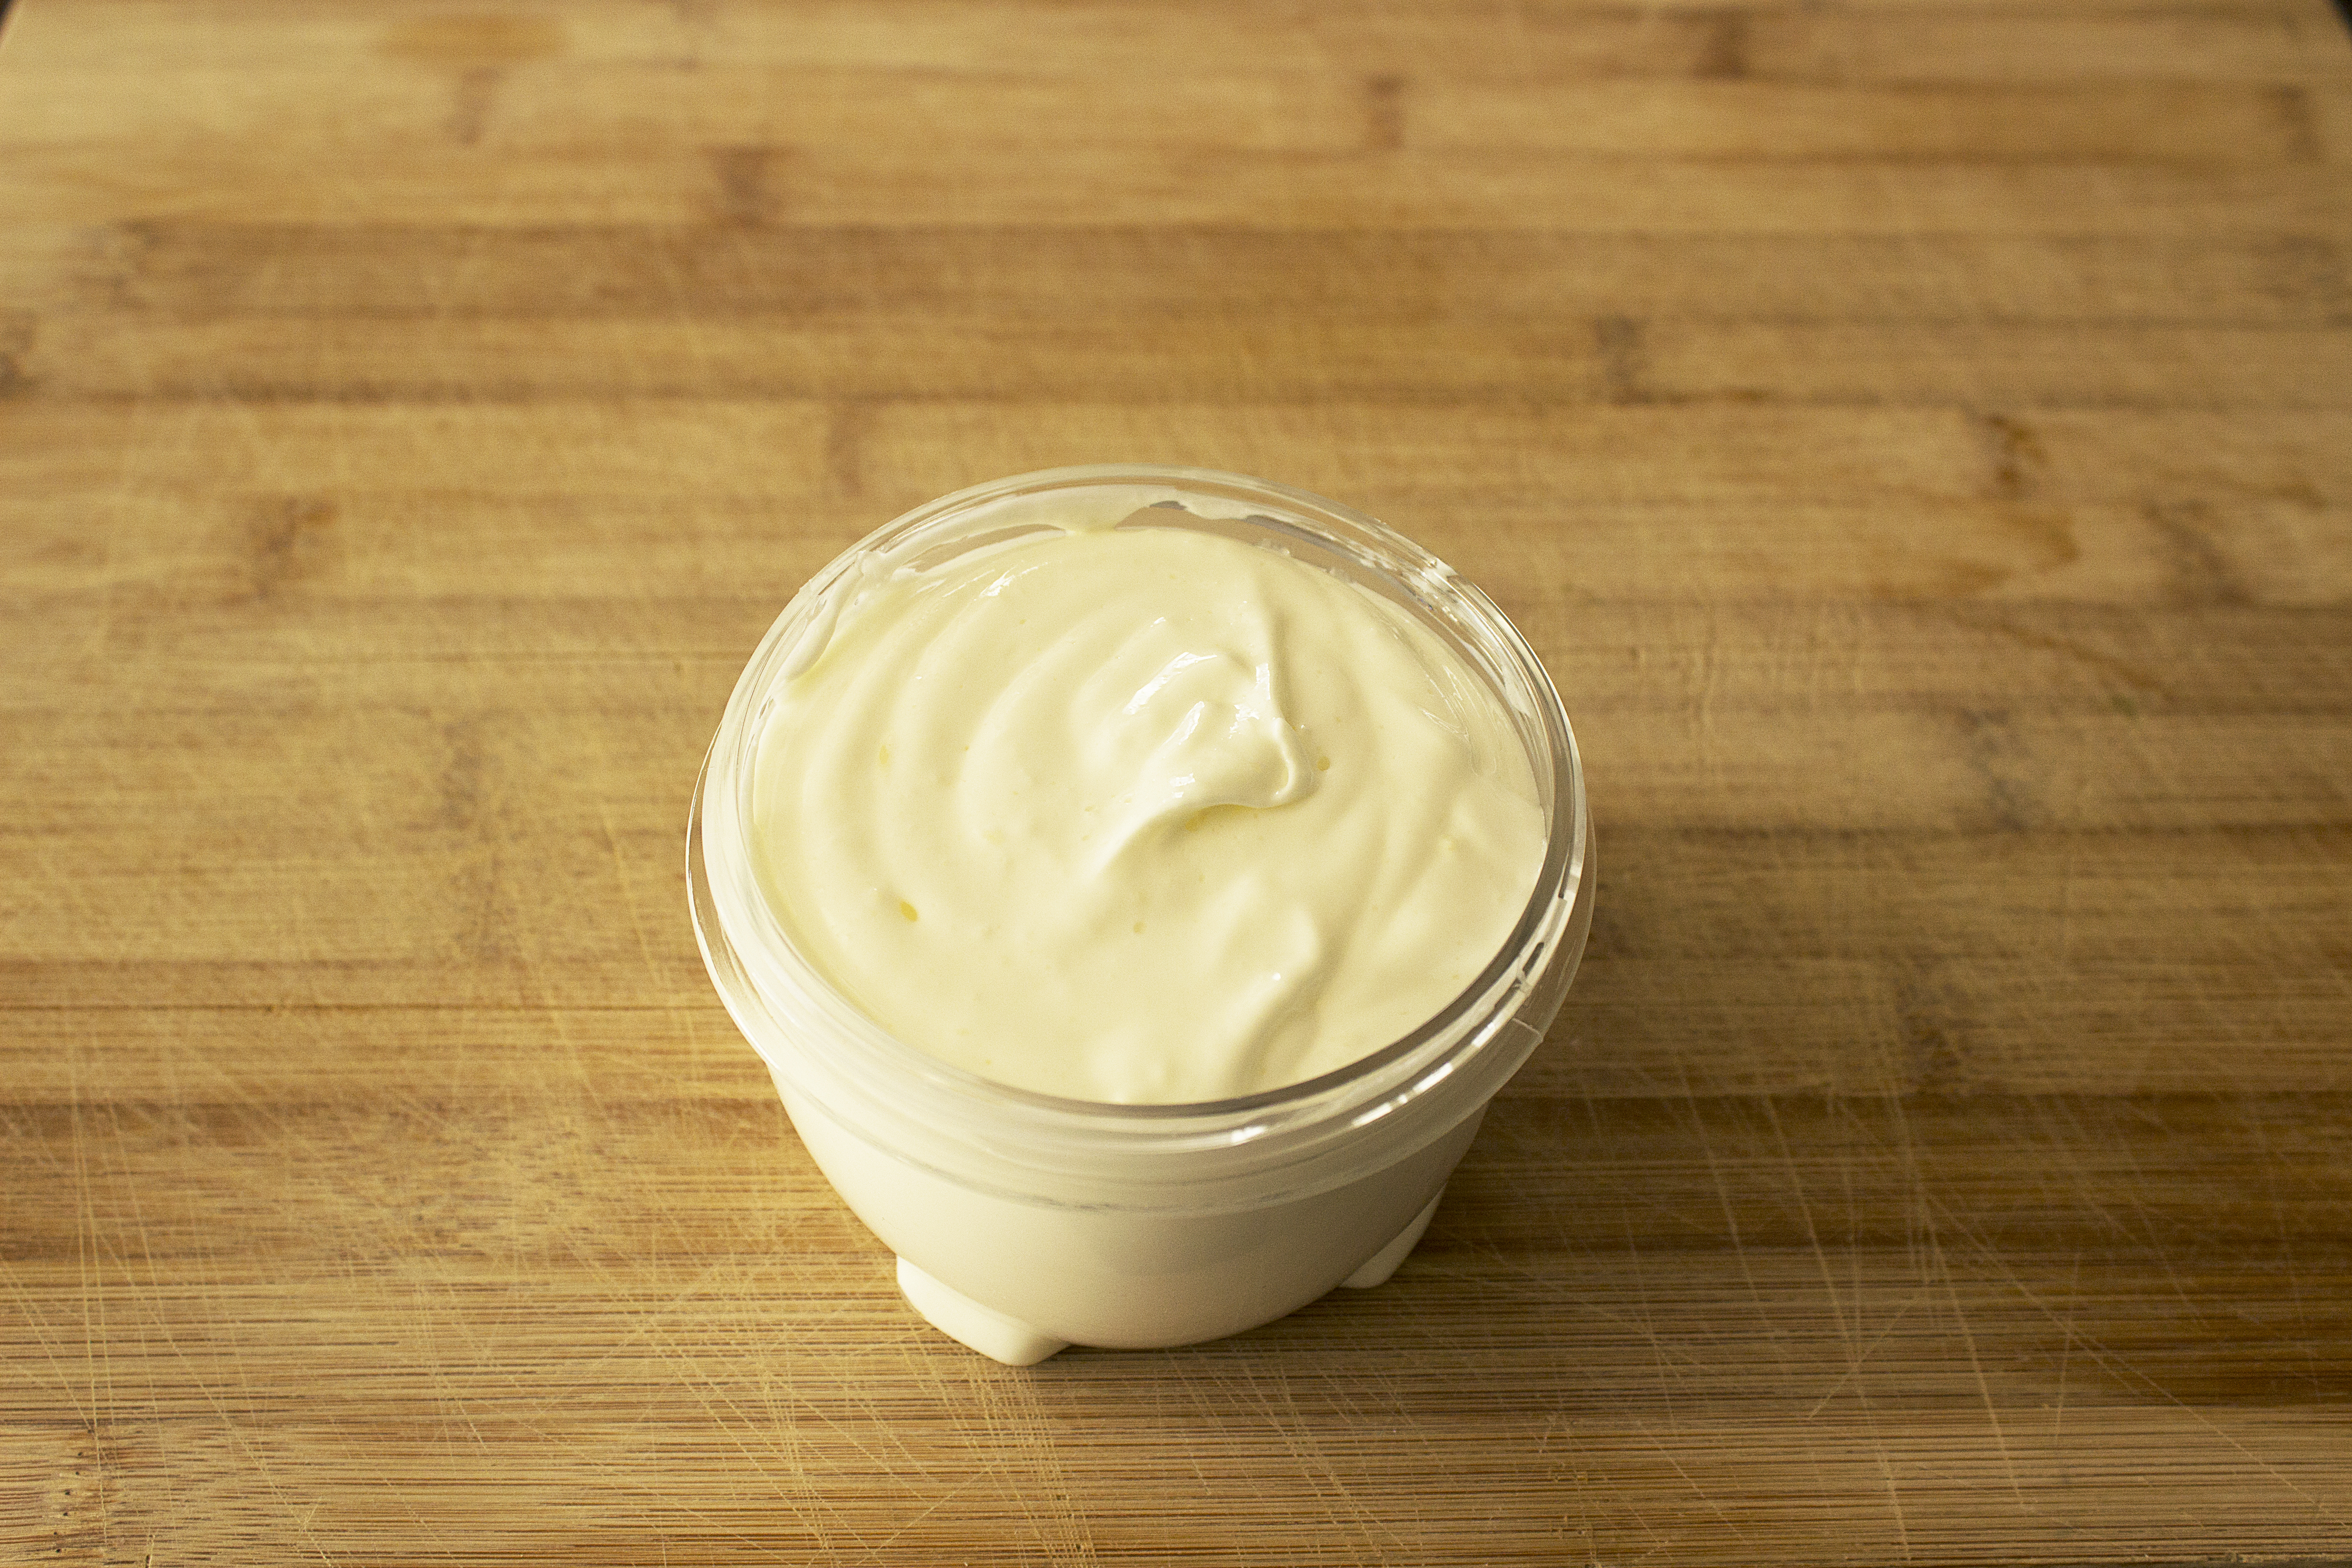
hair_mask_shine_1

hair_mask_shine_3

The Frizz

Things you’ll need:

  • 1/2 ripe Banana
  • 1 Tbsp plain Yogurt
  • 1/2 Tbsp Honey

Instructions:

Step 1 – Blend ingredients until smooth. Get the banana lumps out as best as you can.

Step 2 – Apply to damp hair from top to bottom

Step 3 – Cover and let sit for 30-45 min

Step 4 – Rinse well with shampoo and conditioner (especially if it’s a bit lumpy or you’ll get banana chunks in your hair like I did)

hair_mask_frizz_1

hair_mask_frizz_3

Solid Lotion Bars

Beauty, Craft, DIY

I found this recipe when looking for ways to use up my giant wad of shea butter that was most likely nearing the end of it’s recommended shelf life. These bars are great for when your skin is screaming for moisture. If made according to the recipe they can be used as a lotion or massage bar. They are a touch greasy but if that’s not your jam they can be easily modified by adding more shea butter and beeswax. They are also perfect to carry around in your bag since they won’t ooze out and ruin all of your precious stuff. I splurged and bought some metal tins to store the finished product but any resealable glass or plastic container will do.

Things you’ll need:

    • 1 cup Beeswax pellets or grated beeswax
    • 1 cup shea butter
    • 1 cup coconut oil
    • essential oil (optional. I used lavender, sweet orange and peppermint)
    • Silicon molds and/or metal tins

Instructions:

Step 1 – Melt beeswax, shea butter and coconut oil stirring occasionally until combined

Step 2 – Pour into molds or tins

Step 3 – Allow to cool fully until solidified

Step 4 – Pop out of molds and lotion yourself to your hearts content.

DIY Bees Wraps

DIY

It happened. I ran out of plastic wrap. The last time this happened my Mom was in town. She swooped in and before I could do anything about it, I had another box. By the way, thanks Mom! I l love you. I try to use glass or reusable containers for most of my food storage needs but there are some circumstances that call for cling. I’ve been meaning to make beeswax wraps for a while now but was waiting until I was in desperate need to do so. I bought all the stuff I needed, found an old bed sheet and prepared for a slightly more intensive, stickier DIY than I usually attempt. All in all I’d say this was a successful first attempt. I’m new to the bees wrap game but excited to start using these bad boys and see what all the fuss is about. The best part of course is that I’m cutting down on my use of single use plastic and food waste while I’m at it.

beeswrap2beeswrap4beeswrap5beeswrap6

Things you’ll need:

    • .35 oz Pine Rosin
    • .7 oz grated Beeswax or Beeswax pellets
    • 1 Tbsp Jojoba Oil
    • Cotton fabric (I used an old bed sheet)
    • Pinking shears (optional but a good idea)
    • paint brush
    • Double boiler
    • Baking sheet


  • Parchment paper

Instructions:

Step 1 – Preheat oven to 300°F.

Step 2 – Mix pine rosin, beeswax and jojoba oil in a double boiler and melt over medium heat until thoroughly blended together (about 15 minutes).

Step 3 – Pre-cut fabric and place onto parchment lined baking sheets.

Step 4 – Brush melted beeswax mixture onto fabric. It will dry fast and be uneven at this point which is totally fine.

Step 5 – Bake coated fabric for 1-2 minutes until wax remelts and the fabric looks wet.

Step 6 – Working quickly, brush the melted wax to evenly coat the fabric and wipe away the excess.

Step 7 – Let the wraps dry for at least a few minutes.

beeswrap8

Exfoliating Sugar Face Scrub

DIY

This sweet little scrub is simple to make and is a great way to treat yourself on the regular. It’s easy to customize, just remember the general rule of two parts sugar to one part oil. Keep it simple or get creative. Enjoy the benefits of exfoliating while spending so little you’ll wonder why you ever paid for a store bought scrub.

face_scrub_1

face_scrub_2

face_scrub_3

Ingredients:

  • 1/2 cup granulated sugar (Baking soda can be used for more gentle exfoliation)
  • 1/4 cup carrier oil (Olive, almond, avocado, coconut and grape seed work great)
  • 1 Tbsp gentle exfoliator (Such as lemon zest, coffee grounds or dried lavender)
  • A few drops of honey (Optional)

Instructions:

Step 1 – Mix all ingredients in a bowl

Step 2 – Store in a closed container and use 1-2 times per week

face_scrub_5

Yoga Mat Spray

DIY

It’s January. What better time to set a resolution to be more active? Although I enjoy attending class at fitness studios and being among real live people, it’s not always an expense I can afford. Luckily, exercise doesn’t need to cost money. It doesn’t even always require leaving your house. Enter Youtube yoga. This DIY yoga mat spray is a perfect compliment to any at home yoga practice. You can even just spray it as a room freshener to liven up your senses. The best part? It literally takes 30 seconds to make.

mat_spray_3

What you need:

  • 3 parts water (distilled is best but not necessary)
  • 1 part alcohol free witch hazel
  • 5-10 drops of tea tree or eucalyptus essential oil (I used tea tree. The key here is to use an oil that has cleansing properties.)
  • 5-10 drops of other essential oil of your choice (I used lavender. This one just needs to smell nice.)
  • Spray bottle (glass is best but not necessary)

Note: The bottle I used holds 1 cup. If yours is a different size you can adjust the drops of essential oil accordingly.

Instructions:

Step 1 – Combine all ingredients into the spray bottle

Step 2 – Shake it up

Step 3 – Spray onto yoga mat and wipe down with an old towel or cloth.

Step 4 – Enjoy doing yoga on your fresh and clean mat.

mat_spray_4


Ways With Granola

DIY, Food

I’ve been on a granola kick. So naturally,  I started wondering how easy it would be to make my own. The answer? Very. What’s great about this recipe is that it is 100% customizable. You can make it as simple or complex as your heart or wallet desires. Just hit up your local grocery or bulk food store and let your imagination and taste buds run wild!

granola_1

What you need:

  • 4 cups rolled oats
  • 1 cup nuts
  • 1/2 cup seeds
  • 1/2 cup dried fruit (chopped if large)
  • 1/2 cup dark chocolate chips
  • 1 tbsp spice (cinnamon, cloves, nutmeg, ginger, allspice, etc.)
  • 1 1/2 tsp vanilla extract
  • 1/3 cup liquid sweetener (maple syrup, honey, agave, etc.)
  • 1/3 cup oil or fat (coconut oil, butter, olive oil, etc.)


Instructions:

Step 1 – Mix dry ingredients together (except dried fruit and chocolate)

Step 2 –  Mix wet ingredients into dry ingredients

Step 3 – Spread on a parchment lined baking sheet

Step 4 – Bake at 300°f for 35 min or until desired colour is reached, stirring twice.

Step 5 – Mix in fruit (if using) while still warm.

Step 6 – Mix in chocolate after cooled.

*Some great add-ins include coconut flakes, banana chips, blueberries, raisins, cranberries, apricots, cashews, almonds, walnuts, pistachio, sunflower, pumpkin, hemp, chia.

* Don’t like dried fruit or chocolate or seeds? Just substitute for more rolled oats or other dry ingredient of your choice!

*I made my granola of the less sweet side. If you want a sweeter granola try using 1/2 cup sweetener and 1/2 cup oil instead.

granola_7

Solid Perfume

Beauty, DIY

I was helping my mom clean out the basement and we came across these cute little jars. Originally purchased from Avon containing cream sachets they were now empty and begging for a purpose. DIY to the rescue! What better to fill an old perfume container than more perfume? This solid perfume is a great gift. It doesn’t last as long as a traditional store bought perfume but it’s all natural and can be reapplied throughout the day. It’s incredibly quick and easy to make and you can experiment with your favourite essential oils to make your own personal scent.

solid_perfume_2

What you need:

  • 2 tbsp beeswax (grated or pellets)
  • 2 tbsp carrier oil such as coconut, jojoba, grapeseed, etc. (I used sweet almond)
  • About 60 drops of essential oil or blend of your choice (I used ylang ylang, sweet orange and lavender)
  • repurposed (or new) containers to put the finished product.

*when using essential oils do your research! Some oils may cause irritation to the skin or are photosensitive. Better safe than sorry.

Instructions:

Step 1 – combine beeswax and oil in a double boiler and melt.

Step 2 – Once melted remove from heat and let cool slightly before mixing in your oils.

Step 3 –  Carefully pour into your containers and allow to solidify for a few minutes before capping.

solid_perfume_8

Dry Shampoo

Beauty, DIY

Whether you’re out of time, on vacation, or just don’t feel like it, this dry shampoo is perfect on days when you just can’t wash your hair. This all natural dry shampoo recipe is a fantastic substitute for store bought concoctions. Arrowroot starch acts to soak up grease and cocoa powder is a great additive for people with dark hair, like myself. Not to mention the added bonus of smelling like chocolate!

shampoo_1


What you need:

  • 2 tbsp arrowroot starch (can use corn starch or baby powder instead)
  • 2 tbsp cocoa powder (optional: for dark hair only)

Instructions:

Step 1 – combine arrowroot starch and cocoa powder (if using).

Step 2 – transfer to airtight container for storage.

Step 3 –  Apply with make up brush or comb. Enjoy!

shampoo_5

3 Ingredient Lotion

Beauty, DIY

It’s almost December and I live in Toronto, Canada. That means that my skin is hating its life right now and it’s only just the beginning of a long, long winter. Up until now I’ve been getting by with occasional moisturizing using my homemade body butter but I find it too greasy for consistent everyday use. Enter this recipe. This quick and easy lotion is light and non-greasy. If you use it after a shower it soaks right into your skin and the best part is there are only 3 ingredients!

What you need:

  • 3/4 cup liquid oil (I used sweet almond oil but you can use one or a combination of several oils such as avocado, jojoba, olive, argan, coconut etc.)
  • 3 tbsp grated beeswax
  • 3/4 cup luke warm water, herbal tea or rose water (I used water)
  • 5-10 drops essential oil (optional: I didn’t use any)
  • food processor

Instructions:

Step 1 – Combine oil and beeswax in a double boiler until melted.

Step 2 – With water in food processor, turn on high.

Step 3 –  Pour oil mixture into food processor VERY slowly. The goal is to emulsify the liquids. Once you’ve poured all of the oil into the water you should be left with a creamy lotion.

Step 4 – Transfer lotion into a glass jar or other container with lid. Can store at room temperature for about 3 weeks.

lotion_5.jpg

Soy Candles with Reused Containers

Craft, DIY, Home

I have been holding on to some fancy yogurt cups not sure why or how I would ever use them. Cute little glass containers with no lids; though I had no immediate use for them I thought they were too adorable to send out of my life forever. Then finally it came to me. I’ve never made candles before but I thought I would give it a try and I’m glad I did. They are easy, customizable and the perfect use for old glasses and jars that are just taking up space. I love how easy it is to personalize this recipe with different combinations of scents and reused or vintage containers!

What you need:

  • Soy wax flakes
  • Candle wicks
  • Hot glue gun
  • Clothes pins (can use pencils instead)
  • Fragrance or essential oils (I used combinations of Jasmine, Sage, Lavender and Grapefruit oils)
  • Glass or ceramic containers to hold wax (I reused some old yogurt cups)
  • Microwavable bowl or double boiler for stovetop (I used a microwavable measuring cup for easy pouring)

Tips:

  • Soy wax flakes really shrink down when melted. To measure the approximate amount to make your candles, fill each of your containers with flakes twice.
  • For easy clean up lay down some parchment paper on your work surface.

Instructions:

Step 1 – Using a hot glue gun fix wicks to the bottom of you containers. This really helps keep the wicks in place.

Step 2 – Thread your wicks through clothespins to keep them centered. If you’re using pencils, wrap your wick around the pencil so it is held in place.

Step 3 – Measure your soy wax flakes and place into microwavable bowl.

Step 4 –  Microwave wax for 1 minute and stir. Then continue to microwave at 30 second intervals, stirring after each interval, until wax is completely melted. (can alternately melt wax on stovetop with double boiler)

Step 5 – (optional) Once melted add your scented oils. I used 40-60 drops for 3 small candles but this is really about personal preference. It’s best to start with less and add more if you want a stronger fragrance.

Step 6 – Carefully pour scented wax into your prepared containers.

Step 7 – Let candles sit until the wax is completely hardened. Depending on the size of your candles this can take 2-4 hours. Enjoy!

soy_candles_13