Easy T-Shirt Alterations

DIY, Style

Sometimes I just need a change. I don’t want to spend money but I want to treat myself to something new. I have so many old t-shirts that I can’t seem to get rid of. Although I often donate or repurpose these items, sometimes I find that a few simple alterations can revitalize an old piece and get me excited about my old tees again. Below I’ve outlined some quick and easy ways to ramp up your existing wardrobe. The great thing is you can combine elements from each shirt and customize your look as you please.
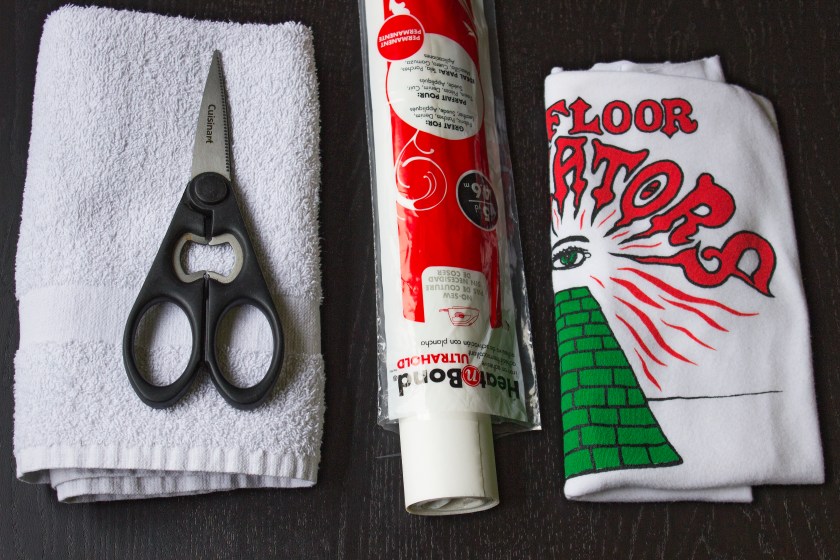
What You Need:
  • Old T-shirt(s)
  • Scissors (the sharper the better)
  • Pencil/ pen/ tape – something to mark where you want to cut (optional)
  • ruler (optional)

Shirt #1 – high/lo waist + cut out neck (bonus rolled sleeves for final touch

High/Lo Waist

Step 1 – Try on the shirt and mark with a pencil 1-2 inches below where you want the front of your hi/lo top to sit. Just one small dot on the front will do.

Step 2 – Lay the shirt on a flat surface and smooth out the wrinkles.

Step 3 – Draw 2 lines: line 1 across the front of the tee (where you drew your initial dot) and line 2; a curve along the bottom hem leading up to line 1.

Step 4 – Cut along the curve line so both the front and back of the shirt are curved. *If you want a front and back scoop you can stop here.

Step 5 – Finally, cutting only the front of the shirt, cut along the remaining drawn line.

Cut Out Neck

Step 1 – Cut Along outside seam of existing collar.

Bonus: Roll up sleeves. 

Shirt #2 – Sleeveless + Peek-a-boo Back

Sleeveless

Step 1 -Lay the shirt on a flat surface and smooth out the wrinkles.

Step 2 – Cut the sleeve(s) off using the seam as a guide. I cut 1 cm inside of the seam all around. (You can of course cut further inside the seam. You may wish to draw a pencil line if so. Remember, a little goes a long way.)

Tip: You can ensure symmetry by flipping the removed 1st sleeve over and using it as a template for the 2nd cut.


Peek-a-boo Back

Step 1 – On the back of your shirt, draw a scoop. It can be helpful to try the shirt on before cutting and making a rough mark where you want the dip to end.

Step 2 – keeping the collar of the tee intact, cut along the base of the collar and along the scoop line you’ve drawn.

Shirt #3 – Cropped + Sleeveless

Cropped

Step 1 – Try on your T-shirt and mark where you want to crop it.

Step 2 – Cut a straight line across where you marked you’re crop line.

Sleeveless – See Shirt #2


Tip: When cutting a t-shirt, remember that the fabric with roll after it’s cut. Some weights of tee will roll more than others. It’s best to leave a 1-2 inch allowance. *Unless you don’t mind showing more skin. 

Recycled T Shirt Necklace

Style

I’ve been looking for a statement necklace for a while but haven’t been able to find one I like in my price range. I saw some tutorials on repurposing old T shirts for wearable accessories so I thought I’d give it a try. I used stained tees and 99 cent bin finds to create this unique piece. It’s simple to make, very customizable and requires no sewing! I love that this necklace can be easily modified to fit any style or skill level.


What you need:

  • T shirt(s) – One or more depending on how many colours you want to use.
  • Scissors

Instructions:

Step 1 – Cut T shirt(s) into 1 inch strips starting at the bottom seam. The number of strips you need will depend on what you want you necklace to look like. I used 7strips (3 white, 2 black and 2 yellow) to complete the necklace in the photos shown.

Step 2 – Once cut you’ll end up with loops of fabric. Stretch these loops as much as possible without tearing. This will curl the fabric and give you a string-like look.

Step 3 – Take 3 loops of one colour (white) and tie the ends together with a fourth loop (yellow). Tie the yellow loop around so that there is a long tail. You will use this to cover the seam and finish off the necklace.

Step 4 – Take 3 more loops of a different colour (2 black and 1 yellow) and make them into a braid.

Step 5 – Tie the ends of the braid to the first cluster of loops to make one cluster of loops.

Step 6 – Using the yellow “tail” that is hanging out, wrap the loose ends of the necklace. When covered, tuck the end of the tail under itself to finish.

Note:

For a more basic piece you can stop at Step 2. You could also simply create a braid and tie the ends together. There are many colour and style modifications that can be made if you choose to use this as inspiration and do your own thing. Enjoy!

tnecklace_17-e1503344847807.jpg


NO SEW RECYCLED TEE SHIRT PATCHES

Style

When attempting to downsize my closet, I came across a few ill fitting tees that I never wear. The problem is, I love the print! Rather than donate them and never see these prints again I decided to find a way to turn them into patches so I can appreciate the graphic on a better fitting article of clothing. In this tutorial I’ll show you how to turn your neglected tees into super rad patches that you can put on a jacket, back pack or just about anything that you want, as long as you can lay it flat and iron it.

tee_patch_10tee_patch_6tee_patch_4tee_patch_3tee_patch_2

What you will need:

  • Iron
  • Scissors
  • Old towel (might get a bit sticky so don’t use a good one)
  • Heat n Bond “Ultrahold” iron-on adhesive
  • Graphic Tee shirt or other fabric with patch graphic
  • Another piece of fabric or article of clothing to adhere your patch to once finished

Instructions:

Step 1 – Cut the graphic out of your tee. Be sure to make it a bit larger than you want your patch to be. You will be able to cut it to the exact size later.

Step 2 – Following the directions on the Heat n Bond package, layer your towel, then tee shirt, then Heat n Bond on a flat surface. The tee shirt should be facing down and the sticky side of the Heat n Bond will be touching the back of it.

Step 3 – Iron the Adhesive paper to attach it to your Tee shirt. You will need to press and hold the iron and move around the image so the entire surface has an even amount of heat applied.

Step 4 – Cut your patch with sharp scissors to the exact size you want your patch to be.

Step 5 – Peel the paper from the back of your patch, position onto your article of clothing and iron again to adhere.

tee_patch_15